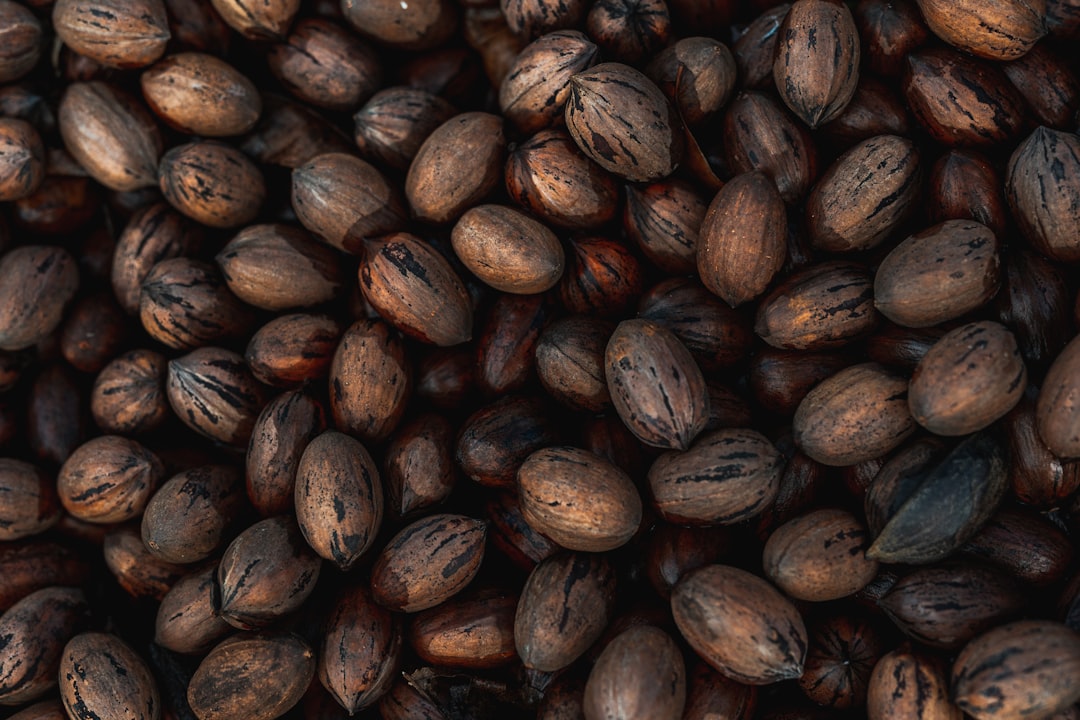
Getting started with planting castor seeds in Nigeria isn’t as complicated as it might first appear, especially once you understand a few key things about the local climate and soil. Basically, it boils down to picking the right spot, preparing the ground, choosing suitable seeds, and giving them a bit of care. With a bit of planning and consistent attention, you can definitely grow a successful castor crop here.
Understanding the Climate and Soil Requirements for Planting Castor Seeds in Nigeria
Nigeria’s diverse climate offers a range of conditions, and understanding these is crucial for a good castor harvest. Castor plants are fairly resilient, but they do have preferences.
Climate Considerations for Castor in Nigeria
Castor generally thrives in warm, tropical, and subtropical regions. This is good news for most of Nigeria. The plant prefers temperatures between 20°C (68°F) and 30°C (86°F) for optimal growth. Extreme cold is a no-go, and while it can tolerate hot weather, prolonged periods above 35°C (95°F) can stress the plant and reduce yield, especially during flowering.
Rainfall is another big factor in Planting Castor seeds, which need a good amount of rain, ideally between 600 mm and 1200 mm annually, well-distributed throughout their growing season. Too much rain, particularly during flowering and capsule development, can lead to fungal diseases and reduce pollination, which ultimately cuts down on your yield. On the flip side, castor is pretty drought-tolerant once established, thanks to its deep root system. This makes it a good option for areas with unpredictable rainfall patterns, though consistent moisture during early growth and flowering is still best.
Sunshine is also important; castor plants love full sun. They need at least 6-8 hours of direct sunlight daily to grow robustly and produce well.
Ideal Soil Types for Castor Cultivation
When it comes to soil, castor isn’t overly fussy, but it definitely performs best in well-drained, fertile soils. Loamy or sandy-loamy soils are generally ideal. These soil types allow for good aeration and root penetration, which is important for the plant’s deep taproot.
The pH level of the soil should ideally be between 6.0 and 7.5, which is slightly acidic to neutral. Castor can tolerate a slightly wider range, but sticking within this window will give you the best results.
Heavy clay soils aren’t ideal as they can become waterlogged, leading to root rot. If you have heavy clay, you’d need to amend it significantly with organic matter to improve drainage. Conversely, extremely sandy soils might struggle to retain enough moisture and nutrients, so they would also need enrichment. A soil test is always a good idea to understand what you’re working with and what amendments might be needed.
Selecting the Right Location for Planting Castor Seeds in Nigeria
Choosing the right plot of land is a foundational step. It’s not just about soil and climate; other practical considerations come into play.
Assessing Sun Exposure and Wind Protection
As mentioned, castor loves sunshine. Pick a spot that gets full, unobstructed sunlight for the majority of the day. Avoid planting near large trees or buildings that will cast significant shade.
While full sun is good, strong winds can be detrimental, especially to younger plants or during the seed-filling stage when plants are laden with capsules. Wind can cause physical damage, break stems, and even reduce pollination. A location with some natural windbreaks, like a gentle slope or existing vegetation on the windward side, can be beneficial. If no natural breaks exist, consider planting a row of sturdier plants or constructing a temporary barrier on the side where prevailing winds come from.
Considering Water Availability and Drainage
Even though castor is drought-tolerant, reliable water availability is crucial, particularly during germination, early growth, and the flowering/fruiting stages. If you’re relying solely on rainfall, ensure the chosen location receives adequate and well-distributed precipitation. If you plan to supplement with irrigation, proximity to a water source (borehole, well, river) and the feasibility of setting up an irrigation system are important.
Equally important is good drainage. Castor roots rot easily in waterlogged conditions. Avoid low-lying areas that tend to collect water after heavy rains. If your land has uneven topography, choose the higher, better-drained sections. Sloping land can be good for drainage, but ensure it’s not so steep that it leads to excessive soil erosion.
Crop Rotation and Previous Land Use
Think about what was grown on the land previously. Practicing crop rotation is good for soil health and helps manage pests and diseases. Avoid planting castor in areas where other solanaceous crops (like tomatoes, peppers, eggplants) or other plants susceptible to similar pests and diseases have recently been grown, as this can lead to a buildup of pathogens in the soil. A good rotation involves alternating castor with different crop families, perhaps cereals or legumes.
Preparing the Soil for Planting Castor Seeds in Nigeria
Good soil preparation sets the stage for healthy plant growth and a successful harvest. It’s an investment of time that pays off.
Clearing and Tilling the Land
Start by clearing the land of any weeds, crop residues from previous seasons, and debris.
This can be done manually, mechanically, or by using appropriate herbicides if necessary. Once cleared, the soil needs to be tilled. Tilling involves breaking up the compacted soil to improve aeration, drainage, and make it easier for roots to penetrate.
For smaller plots, hand tools like hoes can suffice.
For larger areas, machinery like ploughs or tillers is more efficient. The depth of tilling can vary, but generally, 15-30 cm (6-12 inches) is sufficient. Deep tilling is particularly beneficial if you have compacted soil or a hardpan layer below the surface, as it encourages the deep root development that castor is known for.
After tilling, aim for a fine, crumbly soil structure without large clods.
Incorporating Organic Matter and Fertilizers
Castor is a fairly heavy feeder, so enriching the soil with organic matter and essential nutrients is vital. Before planting, conduct a soil test. This will tell you exactly what your soil is lacking and prevent you from over-fertilizing or under-fertilizing.
If a soil test isn’t feasible, a general recommendation involves incorporating well-rotted farmyard manure or compost into the soil during the tilling process.
Organic matter improves soil structure, water retention, and provides a slow release of nutrients. Aim for about 10-20 tons per hectare, depending on soil fertility.
In terms of inorganic fertilizers, castor typically benefits from a balanced NPK (Nitrogen, Phosphorus, Potassium) application. Nitrogen promotes vegetative growth, phosphorus aids in root development and flowering, and potassium supports overall plant health and disease resistance.
A common approach is to apply a basal dose of phosphorus and potassium before planting, either broadcast and incorporated into the soil or placed in the planting rows. Nitrogen can be applied in splits, with a portion at planting and subsequent applications as top-dressing later in the growth cycle, especially after the first major flowering. Specific fertilizer recommendations will vary widely based on your soil test results and local agricultural advice, so consult with local agricultural extension workers.
Choosing the Best Castor Seed Varieties for Planting in Nigeria
| Variety | Yield (kg/ha) | Oil Content (%) | Maturity (days) |
|---|---|---|---|
| CRAN 1 | 1200 | 47 | 150 |
| CRAN 2 | 1300 | 45 | 140 |
| CRAN 3 | 1100 | 50 | 160 |
The right variety can significantly impact your yield, oil content, and resistance to local challenges. It’s not a one-size-fits-all situation.
High-Yielding and Disease-Resistant Varieties
When selecting castor seeds, prioritize varieties that are known to be high-yielding in Nigerian conditions. These varieties have been bred or selected for their ability to produce a large number of capsules and a high oil content in the seeds. Information on such varieties can often be obtained from agricultural research institutes in Nigeria, seed suppliers, or experienced local farmers.
Equally important are varieties that demonstrate good resistance or tolerance to common local pests and diseases. For instance, Fusarium wilt, bacterial blight, and capsule borer are issues in some regions. Selecting varieties that can withstand these threats will save you a lot of headaches and potential crop loss. While no variety is completely immune, some show significantly stronger resistance.
Adaptability to Local Conditions
Consider how well a particular variety adapts to your specific microclimate within Nigeria. Some varieties might perform exceptionally well in the drier northern regions, while others are better suited for the more humid southern zones. Factors like maturity duration (early, medium, or late maturing) are also important. Early maturing varieties might be good for areas with shorter rainy seasons, allowing you to harvest before conditions become too dry or wet.
Look for information on local trials or recommendations specific to your state or geopolitical zone. Consulting with local agricultural extension services is often the best way to get this tailored advice. They can provide insights into varieties that have been successfully grown in your immediate area and their typical performance.
Sowing and Caring for Castor Seeds in Nigeria

Once the land is ready and you have your seeds, it’s time to get them into the ground and nurture them.
Sowing Techniques and Spacing
Castor seeds are typically sown directly into the soil. The best time to sow is usually at the onset of the rainy season, allowing the young plants to establish themselves with consistent moisture.
There are a few sowing methods:
- Dibbling: This is common for smaller plots. Using a stick or specialized dibbler, create holes in the soil at the desired spacing. Place 1-2 seeds per hole, then cover with soil.
- Row Planting: For larger areas, seeds can be sown in rows. Create furrows of about 3-5 cm depth. Place seeds at recommended intervals along the furrow, then cover.
Proper spacing is crucial for optimal growth and yield. Too close, and plants compete for light, water, and nutrients, leading to reduced individual plant yield and increased disease risk. Too far apart, and you’re not maximizing the use of your land. A common spacing recommendation for castor is about 90 cm between rows and 60 cm between plants within a row, though this can vary depending on the variety’s growth habit (dwarf vs. tall) and your specific fertility program. After germination, if you’ve planted multiple seeds per spot, thin them out to leave only the strongest seedling per spot.
Initial Care: Watering and Weeding
After sowing, consistent moisture is vital for germination. If rainfall is insufficient, light watering may be necessary. Once germinated, the young seedlings are vulnerable.
Weeding: Weeds compete fiercely with young castor plants for resources. Control weeds early and consistently, especially during the first 6-8 weeks of growth. Manual weeding is effective for small areas. For larger fields, inter-row cultivation (using mechanical tools) can be done, or appropriate herbicides can be used cautiously, ensuring they are suitable for castor and applied correctly to avoid harming the crop. Regular weeding not only reduces competition but also improves air circulation around the plants, which can help prevent some fungal diseases.
Watering: While established castor is drought-tolerant, adequate moisture during critical growth stages – particularly during flowering and capsule formation – is crucial for good yield. If you experience dry spells during these periods, supplemental irrigation will be highly beneficial. Avoid overwatering, as this can lead to root rot; the soil should be moist, not waterlogged.
Fertilizing and Thinning
Fertilizing: Following your initial basal fertilizer application, top-dressing with nitrogen is often required around 4-6 weeks after planting, and again after the first main flush of flowering. This supports continued vegetative growth and seed development. Again, specific rates should be based on soil tests and local recommendations. Always apply fertilizers around the base of the plant, away from direct contact with the stem, and ideally before rain or irrigation so it can be dissolved and taken up by the roots.
Thinning: If you planted multiple seeds per spot to ensure good germination, you’ll need to thin them out after they’ve established their first true leaves. Select the strongest, healthiest seedling and gently remove the others. This ensures each plant has enough space and resources to develop fully.
Managing Pests and Diseases When Planting Castor Seeds in Nigeria
Pests and diseases are a reality in farming, and castor is no exception. Early detection and proactive management are key to minimizing losses.
Common Castor Pests and Their Control
Several pests can affect castor in Nigeria. Understanding them helps in targeted control.
- **Capsule Borer (e.g., Dichocrocis punctiferalis):** This is one of the most damaging pests. The larvae bore into the capsules, feeding on the developing seeds. You might see small holes in the capsules and frass (insect excrement).
- Control: Regular field scouting to detect early infestations. Hand-picking damaged capsules can be effective for small plots. For larger areas, biological control agents (like parasitic wasps) or judicious application of approved insecticides can be used, following recommended guidelines.
- Aphids and Whiteflies: These tiny insects feed on plant sap, leading to stunted growth, distorted leaves, and can transmit viral diseases. You might see them clustered on the undersides of leaves.
- Control: Natural predators often keep them in check. For severe infestations, insecticidal soaps or neem-based pesticides can be effective.
- Leaf-eating Caterpillars: Various caterpillar species can chew on leaves, defoliating the plants.
- Control: Hand-picking for small infestations. Bacillus thuringiensis (Bt), a biological pesticide, is effective against caterpillars and is generally safe for beneficial insects.
- Termites: Can damage roots and stems, especially in drier regions.
- Control: Good field hygiene, removal of dead wood. In severe cases, soil drenching with appropriate termiticides might be necessary before planting.
Integrated Pest Management (IPM) is the best approach. This combines cultural practices (like crop rotation and good sanitation), biological control, and chemical control as a last resort, to manage pests sustainably.
Identifying and Managing Castor Diseases
Castor plants can be susceptible to several diseases, particularly under specific environmental conditions.
- Fusarium Wilt: A soil-borne fungal disease that causes wilting and yellowing of leaves, often starting on one side of the plant. The internal stem may show discolouration when cut.
- Management: Use resistant varieties where available. Crop rotation and maintaining good soil drainage are crucial. Avoid planting in fields with a history of Fusarium wilt.
- **Bacterial Blight (Xanthomonas campestris pv. ricini):** Causes water-soaked lesions on leaves, stems, and capsules, which later turn brown or black. Can lead to defoliation and capsule rot.
- Management: Use disease-free seeds. Crop rotation and proper sanitation are important. Avoid overhead irrigation, which can spread the bacteria. In severe cases, copper-based bactericides might offer some control.
- **Grey Mold (Botrytis ricini):** Favored by cool, humid conditions. Causes fuzzy grey growth on leaves, flowers, and capsules, leading to rot.
- Management: Improve air circulation through proper spacing and weeding. Avoid excessive humidity. Fungicides may be needed in very susceptible conditions.
- **Rust (Melampsora ricini):** Appears as small, raised, orange-brown pustules, mainly on the undersides of leaves. Severe infestations can cause defoliation.
- Management: Use resistant varieties. Clean up plant debris after harvest to reduce overwintering spores. Fungicides can be used if the disease pressure is high.
Again, prevention is better than a cure. Start with healthy, disease-free seeds, practice good field hygiene, and ensure optimal plant spacing and nutrient management to keep plants strong and resilient.
Harvesting and Processing Castor Seeds in Nigeria
The harvest is the culmination of all your hard work. Knowing when and how to harvest, and what to do with the seeds afterwards, is essential for maximizing your return.
Knowing When and How to Harvest
Castor plants mature asynchronously, meaning capsules ripen at different times on the same plant. This makes harvesting a continuous process rather than a single event.
- When to Harvest: Look for capsules that are turning yellow-brown and starting to split open, exposing the seeds. If you wait too long, the capsules will shatter and drop the seeds, leading to yield loss. If you harvest too early, the seeds won’t be fully mature and will have lower oil content.
- Harvesting Method: Harvesting is typically done manually by breaking off the mature, dry capsules from the plant. This usually involves multiple pickings over several weeks as more capsules ripen. For larger-scale operations, some mechanical harvesters are available, but they are often complex due to the asynchronous ripening. Be gentle to avoid damaging the plant for subsequent harvests.
Drying and Threshing Castor Seeds
After harvesting, the capsules still need to be fully dried and the seeds extracted.
- Drying: Spread the harvested capsules thinly on mats, tarpaulins, or concrete floors in direct sunlight. This sun-drying process helps the remaining green capsules to dry out and encourages them to split open, making seed extraction easier. It also reduces moisture content in the seeds, which is crucial for storage and prevents mold growth. Stir or turn the capsules regularly to ensure even drying. This process can take several days to a week, depending on weather conditions.
- Threshing: Once the capsules are completely dry and many have opened naturally, the next step is threshing. This involves separating the seeds from the chaff (the dried capsule material).
- Manual Threshing: For small quantities, you can gently beat the dried capsules with sticks or rub them between your hands.
- Mechanical Threshing: For larger volumes, a simple thresher can be used. These machines are designed to separate the seeds efficiently without damaging them. Always adjust your thresher settings to minimize seed breakage.
Storage and Sale of Castor Seeds
Proper storage is crucial to maintain seed quality and prevent spoilage.
- Storage: After threshing, ensure the seeds are clean and thoroughly dry (moisture content should ideally be below 8-10%) before storage. Store the dried castor seeds in clean, dry, well-ventilated bags (e.g., jute bags) or airtight containers. Store them in a cool, dry place, away from direct sunlight, moisture, and pests like rodents or insects. Regular inspection of stored seeds is recommended to catch any signs of moisture, mold, or pest infestation early.
- Sale: Once processed and stored, the castor seeds are ready for sale. Identify potential buyers in your area, which could include local oil mills, agricultural cooperatives, or traders who deal in oilseeds. Building relationships with these buyers can ensure a ready market for your produce. The price of castor seeds fluctuates based on market demand, oil content, and quality. Sticking to good agricultural practices throughout the growing and processing stages will help you produce high-quality seeds, which typically command better prices.
Discover more from Transville Agro
Subscribe to get the latest posts sent to your email.